Showing posts with label egg allergy. Show all posts

Monday, April 13, 2015

Making Birthdays Happen

Today, he turns 5!  The thought of this day has had me having panic attacks for weeks now.  My aunt pulled through and sent up some goodies from Erin McKenna's Bakery NYC that had me relax a bit knowing that we had safe treats in the house for the events and he loves them.  However this morning, he stressed the importance of having cake with frosting.  Seriously!?!?  on the day of his birthday he throws this at me!!!  Ok...mission accepted....I think!

First thing I do, like anything else is get on the internet and start searching.  When that had me even more frustrated about which one to pick and will it turn out, I searched facebook for allergy moms group and landed on one that was inactive for the last few months.  I decided to post a plea for help anyway and am blessed with a couple of moms who pulled through and sent me chocolate cake recipes that we easy enough!  I sent my husband to the store with a list of things we didn't have at the house and prayed all day while at work that I would be able to pull this off.

There was one recipe that a woman sent to me that was written like I think. Short thoughts and straight to the point so that was the one I used.  And I have really been wanting to try the Dollop frosting, which is gluten free, soy free, and vegan so this was the perfect opportunity!

The first part was easy, combine the wet ingredients with the dry ingredients, split the dough, and bake for ten minutes!  Cool, I can handle that!  So my two youngest and I combined the rice flour, organic sugar, cocoa, baking soda.  The mixer held the light olive oil, eater, vanilla extract, and apple cider vinegar.  I'll admit that I loved that there was no egg replacement because that it usually where everything I bake takes a turn for the worst.  So we put it into to pans and baked just for ten minutes.  Once it cooled for about 5, flipped it onto what was supposed to be wax paper and I didn't have any!  I tried to make due with foil but I seriously recommend being prepared!


I put the cakes in the freezer for about 30 minutes to solidify.  Then removed the cakes and frosted the center with the Dollop Vanilla frosting, flipped the other half on top and iced the rest.  I just added a little food coloring to the frosting in the corner of a little baggie to do some piping and words.  I am seriously not creative, not fancy, and not good in the kitchen so this is a masterpiece for me and it made my little man one happy birthday boy!


special thanks to Rachel D for coming through and helping with this!


Allergy free Oreo Cake

Ingredients:

2 1/2 cups of white rice flour
1/2 cup + 3 tbsp carob powder
2 cups white sugar
2 tsp baking soda

1/4 cup + 2 tbsp light olive oil
2 1/4 cup + 2 tbsp water
1 tbsp vanilla extract
2 tbsp apple cider vinegar

Instructions:

Preheat oven to 350 degrees and grease 2 circle layer pans.

Combine dry ingredients in a large bowl, mix, and set aside

Combine wet ingredients, mix, and add to dry ingredient bowl just until blended.

Divide dough evenly into two cake pans and bake for 10 minutes or until the knife comes out clean.

Let sit for 5 minutes then invert onto wax paper and let cool completely.

Freeze cake for 30 minutes before constructing!


Hope this helps you come up with a great treat for your allergy free munchkin and the family!

Lots of love,
Lisa Fickenworth


Saturday, April 4, 2015

Sunbutter Shako cups

So it's Easter and that used to mean that there was a TON of chocolate that surround us.  The entire family is fanatics about the Reeses cup and reeses eggs made it even better!  However this year, we are limiting the chocolate and since reeses don't quite make the list when it comes to being top 8 allergen free, we needed to find a way to adapt so that Gavin (and momma) wasn't feeling so lonely!  Plus it's a perfect time for me to find another treat that combines allergy free and healthy for my EoE munchkin and Portion Control approved with clean food ingredients for the mommas!

I have been getting creative the past months since I was doing the 21 day fix and chocolate isn't allowed with the extreme plan so we've been making our own, using the super nutrition of shakeology. So it dawned on me that if I can use this to make healthy chocolate substitute then I could use it for a pb cup, right?!?  It seemed way too perfect!  Now before I even start to write down about how easy this is...let me warn you!  I don't make things pretty, lol.  I like to throw things together and just pray that they taste good!  Sometimes things work out, other times not so much. So what I am about to share with you, may not be super pretty but I know many of you moms out there who would be able to finesse the heck out of this for perfection!  So i'll share the roots of the project, and allow your creative minds to expand!


I started with brainstorming what we had because who has time to run to the store when you have a brain storm and I decided on 2 scoops of chocolate vegan shakeology. This meant me and the kids would get some crazy doses of nutrition while enjoying dessert, bonus right!?!  Then to find a way to form it and solidify it, I went with coconut oil and the plan to freeze it.  Sunflower seed butter as the PB alternative, and a dab of gf vanilla extract.  Using the mini muffin pan, which is a genius invention by the way, I think we were set to begin!.  The kids pulled their chairs up to the cupboard and we got started!


Now I warned you, I said things aren't pretty in my kitchen so bear with me!  I first melted the coconut oil and mixed it in with the two scoops of shakeology and the capful of vanilla extract.  I slowly added tbsp of water into the mix until I got the consistency I liked. It was about 8 tbsp total although that can be played with based on how you work with it and form it.  I used the coconut oil on the corner of a paper towel to lightly coat the inside of the tin.  I then scoops about 1/3 of a tsp of the shakeology mix onto the bottom of the tin and attempted to flatten it out the best I could. I think if I mixed it longer and added a tad more water/oil, this would work better.  But it is what it is so we kept going.  I placed a tiny bit of sunflower seed butter in all the tins as the next layer and then topped several of them with more shakeology mix and left a few with just the sun-butter as the top.  The last step was to throw them in the freezer. I would recommend at least 4 hours but I just left them in overnight since it was close to bedtime.


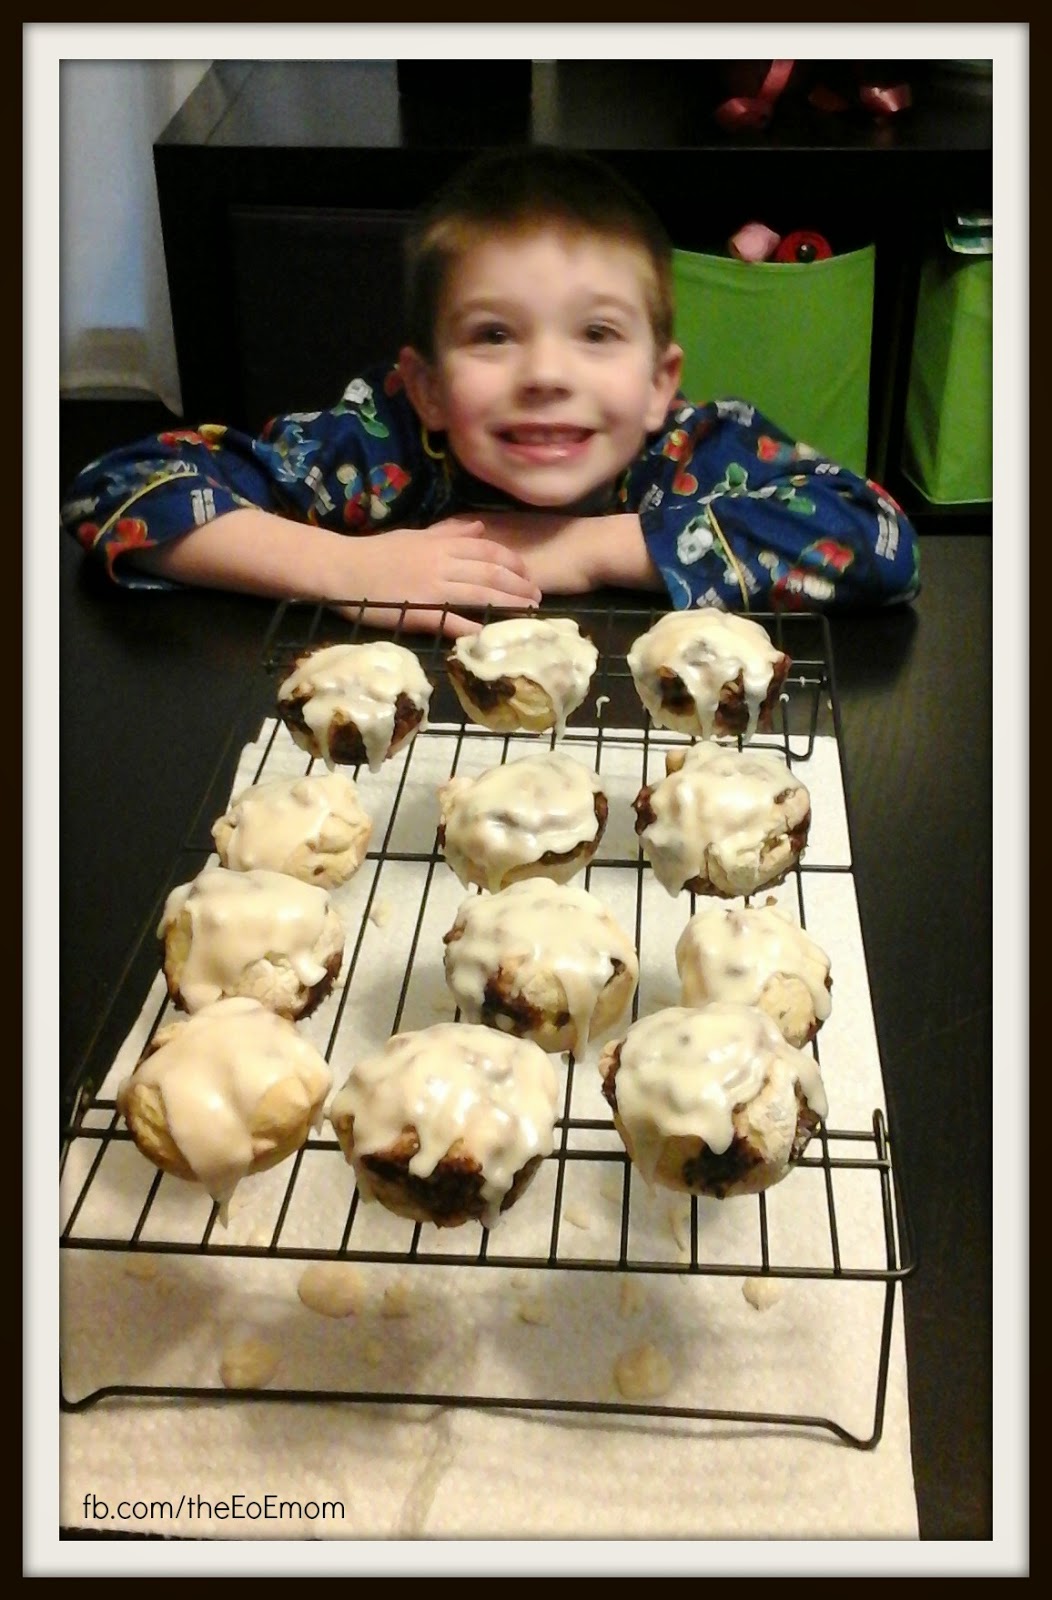
The next morning I pulled the tin out of the freezer and used a spoon to pop them out!  They stayed together and were exactly what I wanted.  Mini sun-butter cups, top 8 allergen free, and packed with nutrition! Perfect for the EoE munchkin, tasty for the girls, and 21 day fix approved for mom!  Chalking this up as a win and can't wait to perfect that constituency so they look as good as they taste for next time.  You are going to want to store them in refrigerator after making so that they stay solid!


Recipe and Preparation

Items needed:
mini muffin pan
1 1/2 tablespoons of Coconut Oil
1/4 water
1/2 tsp of gluten free vanilla extract
1/2 cup of sunflower seed butter or the alternative of your choice

Preparation

1.  Use the corner of a paper towel covered with coconut oil to wipe in the cups of the mini muffin pan.  You will need to prepare for a dozen Sun-Butter cups.

2.  Melt the remaining coconut oil in the microwave.

3.  Place two scoops or servings of vegan chocolate shakeology into a bowl and add in the vanilla extract and melted coconut oil.

4.  Begin to mix or stir ingredients together and begin adding water one tablespoon at a time. Continue to stir until the chocolate mix reaches a consistency that is smooth.

5.  Use about a 1/2 tbsp of shake mix and put on the bottom of each tin cup.  Try to tap the pan at the end to smooth out the bottom layer.  Place in the freezer for 15 minutes.

6.  After 15 minutes the bottom layer should be solid enough to scoop on the sun-butter nice and neat.  The amount you want to use it up to you.  I recommend at least 1/2 a tsp.

7.  Lastly, you can choose to top the cups with more chocolate or leave it with the sun-butter on top. If you choose to top them, you may need to mix another tbsp of water into the shakeology mix and then scoop it onto the top layer of each of the cups and again tap the pan down once you are down to try for a more smooth look.

8.  Place in the freezer for 4 hours or overnight and pop them out with a spoon once they are solid.  Store them in the refrigerator until ready to eat.


AWESOME for portion control planning and when the cravings hit hard!!!  For those of you doing the 21 Day Fix, 21 Day Fix Extreme, Insanity Max or any of the Portion Control meal plans then 2 cups would be: 

1/2 Red
1/2 tsp 


For more information about portion control meal planning, weightloss, clean eating, and exercise, check out the resources at www.itsfitpossible.com or email me!  My goal is to help others find ways to realize that you CAN handle it all!  There are huge benefits in caring for your special needs children when you are caring for yourself as well!  A healthy mom creates a healthy family <3

Lisa Fickenworth
www.facebook.com/lfickenworth

Wednesday, March 25, 2015

Making Easter Rock with food allergies

I honestly was dreading Easter.   Nothing like a holiday filed with chocolate and candy that your child can't have.  So I'm determined to make it awesome in spite of me probably having to tell him "no"  to make things.  

Starting with breakfast, this little bunny bottom will so the trick!   Super simple with a gluten-free pancake mix and using applesauce as an egg replacement.   He probably won't touch the coconut on the tail but that can come off easily enough once the visual effects has passed.  
Next up is the basket.   I have always done just a little candy and something fun anyway so this one seems simple enough.   I ordered a basket of allergy free goodies from Allermates.com.   I am still waiting on it to arrive,  which had me a little nervous  but we also got a ninja turtle t-shirt,  spiderman gloves and a new hat.   It really doesn't take much so I shop for what's on sale and things he wants and needs. 

Moving into the Egg Hunt all the kids are likely going to notice that the bunny went rogue this year but I don't think they'll mind.   I'll fill the eggs with change instead of candy and make it safe for Gavin to find as many as he can with all the other children having fun as well. 

My mom has dinner covered with ham and sweet potato which are both safe foods for him. There are always does these amazing baskets filled with chocolate and goodness.  I'm hoping that no one goes overboard but we'll make it work.   Gavin appreciates the thought even though he might not be able to have it.   He's one heck of a kid!  
For more information about portion control meal planning, weightloss, clean eating, and exercise, check out the resources at www.itsfitpossible.com or email me!  My goal is to help others find ways to realize that you CAN handle it all!  There are huge benefits in caring for your special needs children when you are caring for yourself as well!  A healthy mom creates a healthy family <3

Sunday, March 15, 2015

Allergy Free Cinnamon Rolls for the Win!!!


Allergy Free Cinnamon Rolls 

Cinnamon rolls were a regular staple around here for breakfast going six months back.  Any chance he'd get, my husband would put them in the oven and make a set of the Pillsbury ones for him and the kids and everyone would be happy.  The day we started the elimination diet, they disappeared from the house forever!  We do our best to not have to separate foods because I hate having Gavin has his food and us have ours.  On some things though, it isn't always possible but possible.  However, score one for the family today because cinnamon rolls are back and they are for EVERYONE!

We followed the recipe to a T from Momables.com  HERE and although all of my past recipes have created a little apprehension from the kids when it comes to trying them, these actually turned out really good!!!  


My oldest daughter and I woke up before the rest of the house so we immediately began getting things ready and she was just as excited to be getting cinnamon rolls this morning!  It was so nice to have some quiet time just with her.  I feel like she gets the short end of the stick all the time for being the oldest and sometimes you forget that they need the personalized attention too!  So we enjoyed some quality time preparing all the ingredients and she especially likes that I trust her now to do the measuring and take lead.


 Our substitution ingredients consisted of Regular Coconut milk and lemon juice in place of greek yogurt and Earth Balance spread in place of butter but the rest was straight from the recipe.  I'm copying and pasting hers cause it's only fair to hive her the credit :)

Ingredients
Dough:
  • 1¼ cups plain Greek yogurt (For dairy-free, you can use a souring alternative: 1¼ cups milk substitute of choice + 3 teaspoons lemon juice or apple cider vinegar. Mix and let stand for 10 minutes, then add to recipe.)
  • 4 tablespoons melted butter (For dairy-free, use a substitute like Earth Balance Vegan.)
  • 2½ cups all-purpose gluten-free flour (King Arthur GF Flour is made in a Top-8 allergen-free facility.)
  • ½ teaspoon xanthan gum
  • 2 tablespoons granulated sugar
  • 1¼ teaspoons gluten-free baking powder
  • ½ teaspoon gluten-free baking soda
Filling:
  • ¾ cup packed brown sugar
  • ¼ cup granulated sugar
  • 3 teaspoons ground cinnamon
  • 1 tablespoon melted butter (For dairy-free, use a substitute like Earth Balance Vegan.)
Glaze:
  • ¼ cup melted butter (For dairy-free, use a substitute like Earth Balance Vegan.)
  • 2 cups confectioners sugar
  • 1 teaspoon vanilla extract
  • 3-5 tablespoons hot water
Instructions
  1. Preheat the oven to 425F, and coat either a muffin tin or a 9-inch-round baking dish with cooking spray.
  2. In a large bowl, begin making the dough by mixing the yogurt and 2 tablespoons of the melted butter.
  3. Stir in the flour, xanthan gum, sugar, baking powder, and baking soda until absorbed. The dough will look soft and crumbly.
  4. Move the dough onto a floured work surface, and begin to knead and mix with your hands until smooth.
  5. Form the dough into about a 12x9-inch rectangle, then brush it with the remaining 2 tablespoons of the melted butter.
  6. In another bowl, make the filling mixture by combining the brown sugar, granulated sugar, cinnamon, and melted butter.
  7. Once it resembles a wet sand, spread it evenly onto the dough leaving a ½-inch border. Push the filling firmly into the dough.
  8. Starting on the long side, begin to slowly roll the dough into a tight log. If your fingers are sticking to the dough, lightly flour or moisten them with water.
  9. Pinch the seam to seal the log, and slice evenly into 10 rolls.
  10. Place the slices into your pan, and bake until the edges begin to turn golden brown, about 20 minutes.
  11. Remove from the oven, and move the slices from the pan onto a cooling rack.
  12. As they slightly cool, make the glaze by mixing the melted butter, sugar, and vanilla. Add water 1 tablespoon at a time until you reach the desired consistency.
  13. Drizzle the glaze over the rolls and enjoy!


Prep work...not going to lie, I was a little nervous about the next step...

Never thought I would actually get it to roll!!!  **insert happy dance here***

We went for the muffin pan (cause it's my go-to) but I'm sure the circle pan would work just as well.  


So after 20 minutes of them being in the oven,and me being a nervous wreck cause nothing ever works out this well for me so I was assuming it had to fall apart somewhere. I made the frosting and prepared for the worst...I was the most pleasantly surprised momma to actually smell cinnamon rolls baking and ever more excited when they were a like golden brown as the buzzer went off.  I quickly moved them to the cooling rack and only waiting long enough to stir the frosting cause we like when it melts on top!  We didn't wait too long to eat them either!!!  The end pieces were a little more dough then they were cinnamon but the rest were flavorful and sweet and the majority of the family was happy with the results!  I'm ok with 5 out of 6 in the house eating them, especially when the one who needs the safe foods is enjoying them :)  


So our review of the allergy free cinnamon rolls is a thumbs up!  This is one I would add to the menu once a month as a good breakfast treat!  

Hope you enjoy!

For more information about portion control meal planning, weightloss, clean eating, and exercise, check out the resources at www.itsfitpossible.com or email me!  My goal is to help others find ways to realize that you CAN handle it all!  There are huge benefits in caring for your special needs children when you are caring for yourself as well!  A healthy mom creates a healthy family <3

follow me on Facebook FB.com/itsfitpossible 

Sunday, March 8, 2015

Replacing the Egg

So there are a ton of questions as to what you feed your child when you introduce an elimination diet.  From the beginning I decided that we were going to keep soy as a safe food.  Two years ago, we had attempted an elimination diet when his blood test for allergens came back positive for EVERYTHING except cod.  The soy level was so low though, I kept it in his diet and removed the rest without issues.  Kick me now for not staying with that and listening to the allergist who told me it was a fluke!  Live and learn, I guess.  But moving up to current situation, this kid wants to live off of Gluten free oatmeal and enjoy life chocolate chips.  Although I can't really blame him, I need to ensure a few more nutrients.  He may only be four but he is been influenced enough by though around him to see "healthy foods" as foods that don't taste a good...this could be because I am in no way a good cook, but also because it isn't processed and loaded with sugar so we have been slowly working our way to healthier and cleaner foods.  But he misses fun food!!  So now my job is to make healthy food fun...ok game on!  


We play the game of hide the nutrients!!!  How many of you moms do this?  I'm hoping and praying it's not just me! Do your kids have food that they love that they wouldn't notice a little extra?  I LOVE baking with alternatives to do this.  Since we can't have eggs, this is the perfect opportunity to replace them with good foods.  There are so many egg replacements.  Here are a few of our favorites:


*Banana ½ pureed Banana, abt 1/4 cup = 1 egg

*Flax seeds 1 tbsp ground Flax seeds + 3 tbsp Water = 1 egg

*Pumpkin Puree 1/3 cup of cooked pumpkin = 1 egg

*Applesauce 1/3 cup applesauce = 1 egg or ¼ cup Applesauce + 1 tsp Baking Powder 

*Chia Seed - 1 tbsp ground chia seed + 3 tbsp water = 1 egg 


Baking with egg replacements can be tricky, especially when you have to remove the gluten as well so I prefer to do anything that includes yeast with Chia seeds since they expand. It's kind of like cheating! For pancakes, waffles, scones, and muffins; I prefer the fruits and veggies.  I will also mix and match to get dun flavors.  I always like to toss a little nutritional shake mix into the mix as well just to make sure I've got all the vitamins and minerals covered. Check back for recipes to be posted soon!


I would love to hear about your tips and tricks as an allergy free family!  Sharing is so important when you're doing everything you can to keep yourself and your families healthy!

Lisa Fickenworth