Allergy Free Cinnamon Rolls
Cinnamon rolls were a regular staple around here for breakfast going six months back. Any chance he'd get, my husband would put them in the oven and make a set of the Pillsbury ones for him and the kids and everyone would be happy. The day we started the elimination diet, they disappeared from the house forever! We do our best to not have to separate foods because I hate having Gavin has his food and us have ours. On some things though, it isn't always possible but possible. However, score one for the family today because cinnamon rolls are back and they are for EVERYONE!
We followed the recipe to a T from Momables.com HERE and although all of my past recipes have created a little apprehension from the kids when it comes to trying them, these actually turned out really good!!!
My oldest daughter and I woke up before the rest of the house so we immediately began getting things ready and she was just as excited to be getting cinnamon rolls this morning! It was so nice to have some quiet time just with her. I feel like she gets the short end of the stick all the time for being the oldest and sometimes you forget that they need the personalized attention too! So we enjoyed some quality time preparing all the ingredients and she especially likes that I trust her now to do the measuring and take lead.

Dough:
- 1¼ cups plain Greek yogurt (For dairy-free, you can use a souring alternative: 1¼ cups milk substitute of choice + 3 teaspoons lemon juice or apple cider vinegar. Mix and let stand for 10 minutes, then add to recipe.)
- 4 tablespoons melted butter (For dairy-free, use a substitute like Earth Balance Vegan.)
- 2½ cups all-purpose gluten-free flour (King Arthur GF Flour is made in a Top-8 allergen-free facility.)
- ½ teaspoon xanthan gum
- 2 tablespoons granulated sugar
- 1¼ teaspoons gluten-free baking powder
- ½ teaspoon gluten-free baking soda
Filling:
- ¾ cup packed brown sugar
- ¼ cup granulated sugar
- 3 teaspoons ground cinnamon
- 1 tablespoon melted butter (For dairy-free, use a substitute like Earth Balance Vegan.)
Glaze:
- ¼ cup melted butter (For dairy-free, use a substitute like Earth Balance Vegan.)
- 2 cups confectioners sugar
- 1 teaspoon vanilla extract
- 3-5 tablespoons hot water
Instructions
- Preheat the oven to 425F, and coat either a muffin tin or a 9-inch-round baking dish with cooking spray.
- In a large bowl, begin making the dough by mixing the yogurt and 2 tablespoons of the melted butter.
- Stir in the flour, xanthan gum, sugar, baking powder, and baking soda until absorbed. The dough will look soft and crumbly.
- Move the dough onto a floured work surface, and begin to knead and mix with your hands until smooth.
- Form the dough into about a 12x9-inch rectangle, then brush it with the remaining 2 tablespoons of the melted butter.
- In another bowl, make the filling mixture by combining the brown sugar, granulated sugar, cinnamon, and melted butter.
- Once it resembles a wet sand, spread it evenly onto the dough leaving a ½-inch border. Push the filling firmly into the dough.
- Starting on the long side, begin to slowly roll the dough into a tight log. If your fingers are sticking to the dough, lightly flour or moisten them with water.
- Pinch the seam to seal the log, and slice evenly into 10 rolls.
- Place the slices into your pan, and bake until the edges begin to turn golden brown, about 20 minutes.
- Remove from the oven, and move the slices from the pan onto a cooling rack.
- As they slightly cool, make the glaze by mixing the melted butter, sugar, and vanilla. Add water 1 tablespoon at a time until you reach the desired consistency.
- Drizzle the glaze over the rolls and enjoy!
 |
| Prep work...not going to lie, I was a little nervous about the next step... |
 |
| Never thought I would actually get it to roll!!! **insert happy dance here*** |
 |
| We went for the muffin pan (cause it's my go-to) but I'm sure the circle pan would work just as well. |

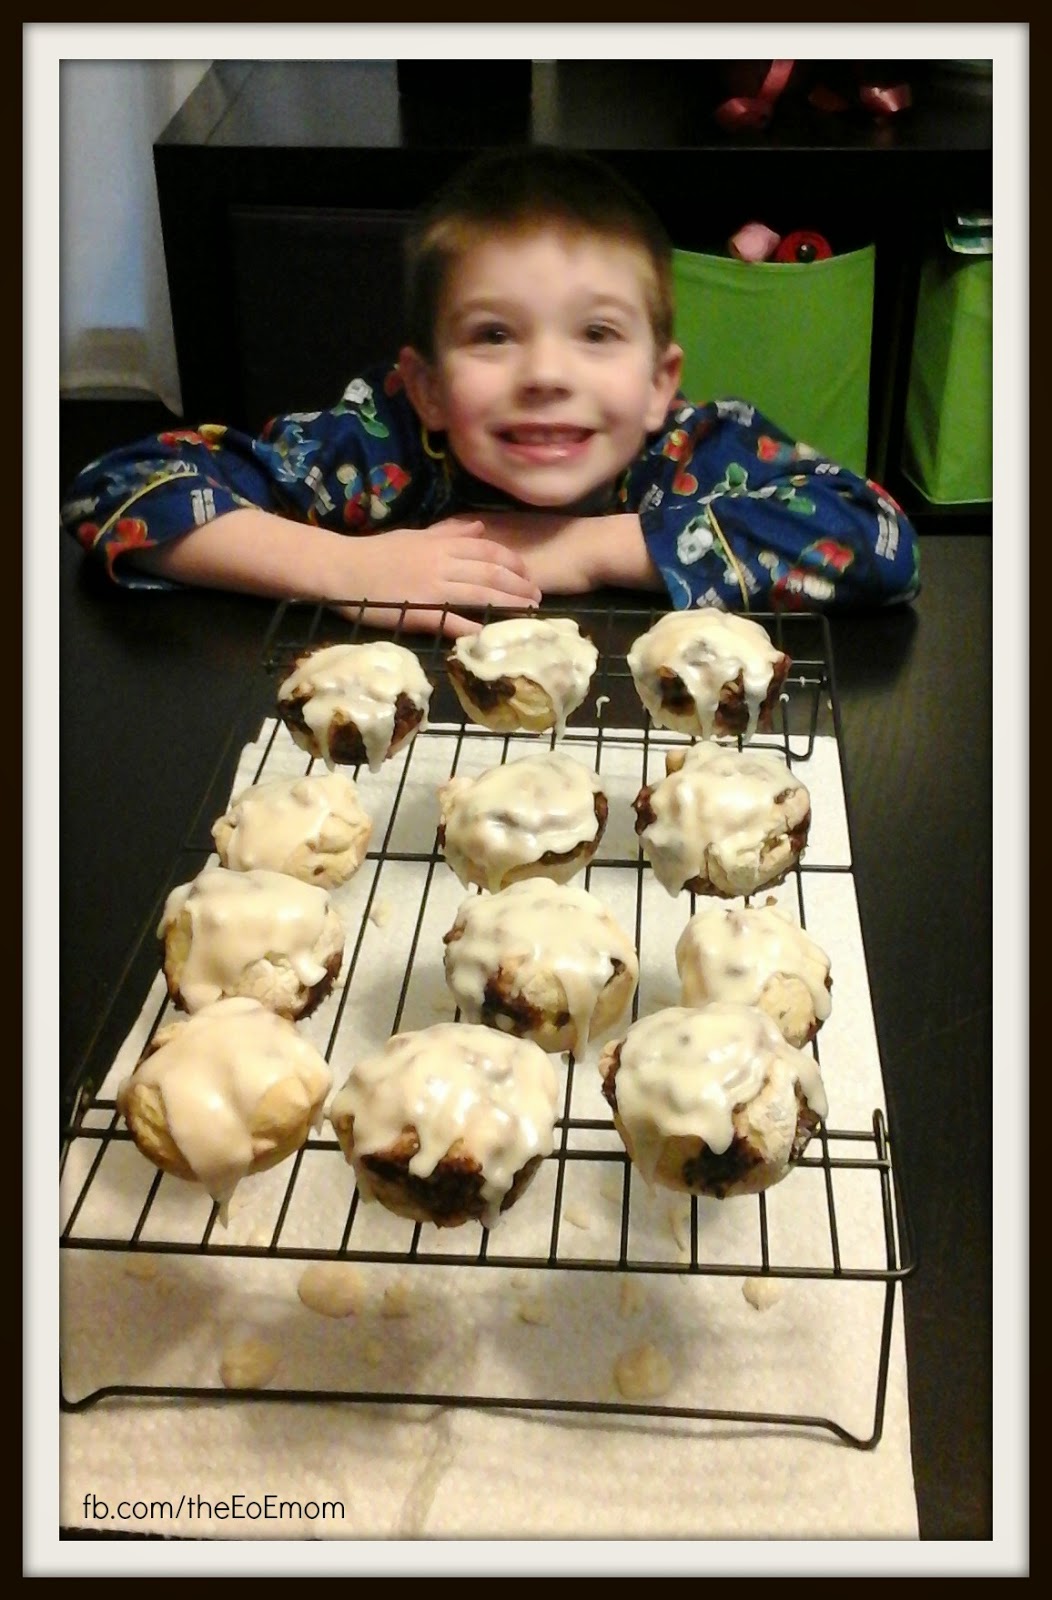
So after 20 minutes of them being in the oven,and me being a nervous wreck cause nothing ever works out this well for me so I was assuming it had to fall apart somewhere. I made the frosting and prepared for the worst...I was the most pleasantly surprised momma to actually smell cinnamon rolls baking and ever more excited when they were a like golden brown as the buzzer went off. I quickly moved them to the cooling rack and only waiting long enough to stir the frosting cause we like when it melts on top! We didn't wait too long to eat them either!!! The end pieces were a little more dough then they were cinnamon but the rest were flavorful and sweet and the majority of the family was happy with the results! I'm ok with 5 out of 6 in the house eating them, especially when the one who needs the safe foods is enjoying them :)
So our review of the allergy free cinnamon rolls is a thumbs up! This is one I would add to the menu once a month as a good breakfast treat!
Hope you enjoy!
For more information about portion control meal planning, weightloss, clean eating, and exercise, check out the resources at www.itsfitpossible.com or email me! My goal is to help others find ways to realize that you CAN handle it all! There are huge benefits in caring for your special needs children when you are caring for yourself as well! A healthy mom creates a healthy family <3
follow me on Facebook FB.com/itsfitpossible
No comments:
Post a Comment